Bookbinding Tutorials: A Comprehensive Guide
Dive into the art of book creation! These tutorials cover everything from beginner pamphlet stitches to advanced case binding techniques, fostering creativity.
Explore stapling, stitching, and decorative elements – a journey into crafting beautiful, lasting books with expert tips and detailed instructions.
Bookbinding, a timeless craft, blends artistry and practicality. Historically, it preserved knowledge; today, it’s a fulfilling creative outlet. Beginners can start with simple techniques like pamphlet stitch, requiring minimal tools and materials.
This guide demystifies the process, offering a pathway from basic stitching to more complex methods. Explore the joy of creating personalized journals, sketchbooks, or unique gifts.
Softcover bindings, such as saddle stitch, provide an excellent starting point. Workshops and online resources abound, offering step-by-step tutorials. Embrace the tactile experience and discover the satisfaction of a handmade book!
Essential Tools for Beginners
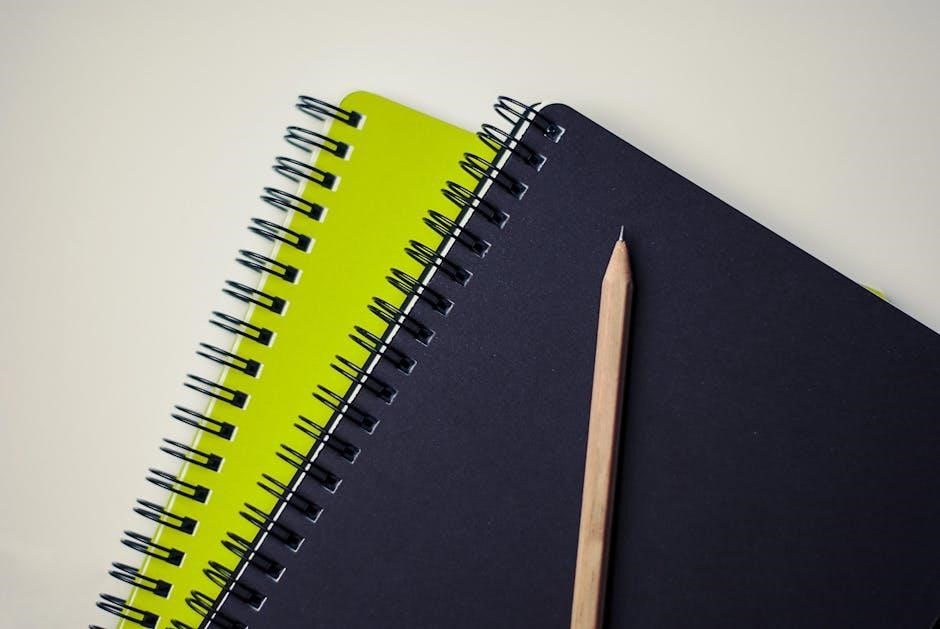
Starting bookbinding doesn’t demand expensive equipment! A foundational kit includes a cutting mat, ruler, and craft knife for precise paper trimming. A bone folder is crucial for creating crisp folds. Needles – specifically, bookbinding needles with large eyes – are essential for stitching.
Waxed linen thread provides strength and durability. A simple awl aids in punching holes for sewing. For saddle stitch, a long-reach stapler is beneficial.
As skills develop, consider a book press, but initially, heavy books suffice. These basic tools unlock a world of creative possibilities, allowing beginners to confidently embark on their bookbinding journey.
Paper Selection for Bookbinding
Choosing paper is vital for successful bookbinding. Consider the book’s purpose: heavier weights (80-100gsm) suit text blocks, while lighter weights work for inserts. Text papers offer a smooth surface, ideal for writing, while laid or wove papers add texture.
Experiment with different finishes – smooth, vellum, or matte. Acid-free paper ensures longevity. For covers, buckram, cloth, or decorative papers provide durability and aesthetic appeal.
Beginners should start with readily available, affordable options. Understanding grain direction is crucial for clean folds and a professional finish.

Basic Bookbinding Techniques
Master fundamental skills! Learn pamphlet stitch and saddle stitch binding – perfect starting points for beginners to create simple, handbound books easily.
Pamphlet Stitch Binding

Pamphlet stitch binding is an incredibly accessible method, ideal for those new to bookbinding. It involves folding sheets of paper, known as signatures, and then stitching them together through the fold. This technique requires minimal tools – just a needle, thread, and potentially an awl for creating holes.
It’s fantastic for creating small booklets, zines, or introductory projects. The process is straightforward, allowing beginners to quickly experience the satisfaction of a handmade book. Preparing the signatures correctly is key, ensuring neat folds and aligned pages for a professional finish.
This simple stitch provides a charming, rustic aesthetic, making it a popular choice for various creative projects.
Preparing the Signatures
Signature preparation is foundational to successful pamphlet stitch binding. Begin by carefully selecting your paper and determining the desired size of your booklet. Sheets are then folded in half, creating the signatures – groups of pages nested together. Accurate folding is crucial; a bone folder assists in creating crisp, clean creases.
Ensure all sheets within a signature are perfectly aligned before folding. The number of sheets per signature impacts the book’s thickness and aesthetic. Typically, beginners start with fewer sheets for easier handling.
Once folded, gently press the signatures to further refine the crease, preparing them for the stitching process.
The Pamphlet Stitch Process
The pamphlet stitch, a simple yet effective binding method, involves sewing through the fold of each signature. Begin by marking stitch locations along the spine – typically three or five evenly spaced points. Using a bookbinding needle and waxed thread, pierce through each marked hole, starting from the outside.

Pull the thread through, leaving a tail, and continue stitching back and forth, creating a secure hold. Ensure consistent tension throughout the process.
Finally, tie off the thread securely, creating a neat and durable binding. This beginner-friendly technique yields a charming, hand-bound booklet.
Saddle Stitch Binding
Saddle stitch binding is ideal for booklets and brochures, utilizing a single staple or series of staples through the fold line. This method is exceptionally popular for its simplicity and cost-effectiveness, making it a fantastic starting point for beginners. It’s perfect for projects with a lower page count, typically up to 64 pages, ensuring a clean and professional finish.
The process involves folding the sheets precisely and securing them with staples, creating a central crease. Mastering this technique opens doors to creating attractive, easily-produced publications.
Folding and Aligning Pages
Precise folding is paramount for successful saddle stitch binding. Begin by carefully aligning all pages, ensuring they are perfectly stacked before folding. A bone folder is invaluable for creating a crisp, clean crease along the spine, enhancing the book’s professional appearance.
Inaccurate alignment leads to uneven edges, so take your time. Consistent pressure during folding guarantees uniformity. Consider using a guide or template for repeated folds, maintaining accuracy throughout the process. This foundational step directly impacts the final product’s quality and aesthetic appeal.
Stapling Techniques for Saddle Stitch
Secure stapling is crucial for a durable saddle stitch binding. Utilize a long-reach stapler designed for bookbinding, ensuring the staples penetrate all layers without exiting excessively. Typically, two or three staples are used, positioned evenly along the spine.
Avoid over-stapling, which can tear the paper. Proper staple placement prevents pages from loosening. Experiment with different staple sizes to find the optimal hold for your paper weight. A firm, even pressure when stapling guarantees a professional finish and long-lasting binding.

Intermediate Bookbinding Methods
Elevate your skills! Explore Japanese Stab and Coptic Stitch bindings, mastering intricate stitching patterns and spine creation for unique, artistic books.
Japanese Stab Binding (4-Needle)
Delve into the elegance of Japanese Stab Binding! This ancient technique utilizes visible stitching through the pages, creating a stunning aesthetic and secure binding. The 4-needle method offers a balanced and visually appealing pattern.
Begin by carefully marking hole positions – precision is key for a neat finish. Utilize a template or measure accurately to ensure consistent spacing. Then, using an awl, create clean holes through all signatures.

The stitching patterns are diverse, but the 4-needle variation is a fantastic starting point. Experiment with thread colors and materials to personalize your book. This method provides a strong, flexible spine, ideal for sketchbooks or journals.
Marking Hole Positions
Precision is paramount when marking hole positions for Japanese Stab Binding. Begin by measuring the spine carefully, determining the desired spacing between holes – typically around 1-1.5cm. Utilize a ruler and pencil to lightly mark these points along the spine’s edge.
A template can significantly aid accuracy, ensuring consistent hole placement across all signatures. Once marked, use an awl to create pilot holes.
Ensure the awl is perpendicular to the spine for clean, straight holes. Consistent depth is crucial; avoid angling the awl. Double-check alignment before proceeding to stitching, as accurate marking dictates the final aesthetic.
Stitching Patterns and Variations
Japanese Stab Binding offers diverse stitching patterns beyond the basic four-needle approach. Explore variations like the Hon-yori-toji, creating a visually striking diagonal stitch. Experiment with different thread colors and materials – silk, cotton, or linen – to enhance the aesthetic.

Consider altering the hole pattern itself, introducing asymmetry for a unique look.
Varying stitch length and tension impacts the spine’s flexibility and appearance. Mastering these nuances allows for personalized book designs, transforming a traditional technique into a unique artistic expression.
Coptic Stitch Binding
Coptic binding is an ancient technique showcasing the spine’s beauty. Unlike many methods, it doesn’t obscure the spine; instead, it features exposed stitching, creating a visually appealing, flexible book; This method links signatures individually, allowing the book to lay flat;
It’s ideal for sketchbooks or journals needing frequent use. The process involves punching holes through each signature and then connecting them with a chain-like stitch.
Coptic binding offers a unique aesthetic and functional advantage.
Creating the Spine
The spine’s foundation begins with accurately measuring and marking the text block. This determines the spine’s width and ensures a secure, aesthetically pleasing case. Carefully round the spine using a hammer and shaping tool, creating a gentle curve for a comfortable grip and professional appearance.
Reinforcing the spine is crucial; linen tape is applied to strengthen it, providing a solid base for attaching the cover. This tape extends beyond the edges of the text block, creating shoulders for the boards to attach to.
A well-formed spine is essential for durability.
Linking Signatures with Coptic Stitch
Coptic stitching uniquely exposes the spine, creating a beautiful, chain-like pattern. Begin by piercing holes through the spine folds of each signature, ensuring alignment for a cohesive bind. Thread the needle through these holes, linking each signature to the next, creating a visible, interconnected structure.
The stitch alternates between signatures, wrapping around the spine and creating a secure, flexible binding. Tension is key; maintain consistent pull for a neat and durable result.
This ancient technique allows the book to lay flat, ideal for sketching or writing.

Advanced Bookbinding Concepts
Master complex techniques! Explore French Link Stitch and Case Binding, demanding precision and skill. These methods elevate your craft, creating durable, artistic books.
French Link Stitch Binding
French Link Stitch is a robust and visually appealing binding method, ideal for longer books requiring a strong spine. This technique involves creating a series of linked chains along the spine, connecting individual sections (signatures) securely.
Preparing the Link Holes requires precise marking and piercing along the spine fold of each signature. Accuracy is crucial for a neat and functional binding. The holes are typically created using an awl or a specialized bookbinding tool.
Connecting Sections with French Link Stitch involves threading waxed linen thread through the prepared holes, creating a continuous chain that links each signature to the next. This method offers excellent flexibility and allows the book to lay relatively flat when open, making it a favorite among book artists and binders.
Preparing the Link Holes
Precise hole preparation is fundamental to successful French Link Stitch binding. Begin by carefully measuring and marking the spine fold of each signature. Consistent spacing ensures a visually balanced and structurally sound book. Utilize a ruler and pencil for accurate markings.
Employ an awl or a bookbinding piercing tool to create clean, evenly spaced holes through the signatures. Accuracy is paramount; slightly off-center holes can compromise the binding’s integrity. Ensure the holes are large enough to accommodate the chosen thread comfortably.
Double-check alignment across all signatures before proceeding. Consistent hole placement guarantees a smooth and professional-looking French Link Stitch.
Connecting Sections with French Link Stitch
Begin the connection by threading the needle through the first section’s link holes, creating a secure anchor. Then, pass the needle through the corresponding holes of the adjacent section, forming a chain-like link. Maintain consistent tension throughout the stitching process for a uniform appearance.
Continue linking each section sequentially, ensuring the thread passes cleanly through each hole. Careful attention to detail is crucial for a durable and aesthetically pleasing bind. The stitch creates a strong, flexible connection between sections.
Securely knot the thread at the final section, completing the binding.
Case Binding: A Brief Overview
Case binding, a durable and professional method, involves creating a separate book case and then attaching the text block. First, construct the case from book board covered in cloth or paper, ensuring precise measurements for a snug fit. The spine is carefully rounded and backed to accommodate the text block’s thickness.
Next, prepare the text block by adhering endpapers to the first and last signatures. These act as a bridge between the text and the case. Precision is key when attaching the text block to the case using glue and careful alignment.
Finally, allow ample drying time for a robust bind.
Creating the Book Case
Constructing the book case begins with accurately measuring the text block’s dimensions – height, width, and thickness. Cut book board pieces slightly larger than these measurements for the front, back, and spine. These boards provide the case’s structure and durability.
Next, cover the boards with chosen book cloth or decorative paper, carefully adhering it to the board’s surface, ensuring neat corners and a smooth finish. The spine piece requires precise fitting, accounting for the spine’s rounded shape.
Finally, join the pieces to form the case.
Attaching the Text Block
Securing the text block within the newly created case is a crucial step. First, apply thin adhesive evenly to the spine edges of the case boards. Carefully position the text block, ensuring even alignment with all sides of the case.
Gently press the text block into the adhesive, applying consistent pressure to create a strong bond. Utilize a backing hammer or bone folder to reinforce the attachment, paying attention to the head and tail of the spine.
Allow sufficient drying time before proceeding, resulting in a beautifully bound book.
Decorative Bookbinding Elements
Elevate your books! Learn to add headbands, tailbands, and elegant spine labels, plus explore vibrant marbling techniques for stunning covers.
Headbands and Tailbands
Headbands and tailbands are decorative elements traditionally glued to the top and bottom of the book spine, enhancing both aesthetics and structural integrity. Historically crafted from silk, linen, or cotton, they now come in diverse materials and colors.
Creating these embellishments involves wrapping threads around cores, often using a jig to maintain consistent tension. The patterns can range from simple stripes to intricate geometric designs.
Tailbands, typically narrower, mirror the headband’s design. They protect the spine ends from wear and contribute to a polished, professional finish. Mastering these details elevates bookbinding projects, showcasing skill and artistry.
Spine Labeling and Titling
Spine labeling and titling are crucial for book identification and presentation. Traditionally, leather or parchment labels were pasted onto the spine, often featuring gold tooling for a luxurious effect; Modern options include paper labels, printed directly onto the spine, or hand-lettering with inks.
Careful consideration of font size, style, and color is essential for legibility and aesthetic appeal. Accurate alignment and spacing contribute to a professional finish.
Techniques range from simple adhesive application to complex gilding processes, adding a personalized touch and completing the bookbinding project.
Marbling Techniques for Book Covers
Marbling adds unique artistry to book covers, creating swirling, organic patterns. The process involves floating paints on a thickened water bath (size), then carefully laying paper or fabric onto the surface to transfer the design. Various techniques exist, including traditional Turkish marbling and more contemporary approaches.
Experimentation with colors, combs, and other tools yields diverse effects. Preparing the size correctly and controlling paint viscosity are key to success.
Sealing the marbled cover protects the design, enhancing its durability and visual impact, resulting in a truly one-of-a-kind book.
Resources and Further Learning
Expand your skills! Discover vibrant online communities and delve into recommended books for continued learning and inspiration in the world of bookbinding.
Online Bookbinding Communities
Connect with fellow enthusiasts! Numerous online platforms foster a supportive environment for bookbinding learners of all levels. These communities offer invaluable opportunities to share projects, ask questions, and receive constructive feedback.
Forums and social media groups dedicated to bookbinding are brimming with tutorials, tips, and inspiration. Platforms like Reddit (r/bookbinding) and Facebook host active groups where members showcase their work and discuss techniques.
YouTube channels, such as Bitter Melon Bindery, provide visual demonstrations of various binding methods. Engaging with these online resources accelerates learning and expands your creative horizons within the craft.
Recommended Bookbinding Books
Expand your knowledge with essential literature! Several books serve as excellent resources for aspiring bookbinders, offering detailed instructions and historical context. “The Complete Bookbinding Manual” by Ian Alistair Robertson is a comprehensive guide covering a wide range of techniques.
For beginners, “Bookbinding for Dummies” provides a user-friendly introduction to the craft. “Making Books” by hand by Kate Goode is also a great resource. These texts offer step-by-step instructions, diagrams, and troubleshooting advice.
Exploring these publications will deepen your understanding of bookbinding principles and inspire you to experiment with different styles and methods.