Bellissimo Technika Oven User Guide ー Comprehensive Plan
This guide details the Bellissimo Technika oven’s operation, safety, and maintenance. It covers initial setup, cooking modes, timer functions, and troubleshooting, ensuring optimal performance.
Welcome to the world of culinary excellence with your new Bellissimo Technika oven! This appliance is designed to bring professional-grade cooking capabilities directly into your home kitchen, offering versatility and precision for all your baking and roasting needs. We understand that introducing a new appliance can seem daunting, but this user guide is meticulously crafted to ensure a smooth and enjoyable experience.
The Bellissimo Technika oven isn’t just a cooking appliance; it’s an investment in your passion for food. Whether you’re a seasoned chef or a beginner cook, this oven’s intuitive controls and diverse cooking modes will empower you to create delicious meals with confidence. From perfectly browned pastries to succulent roasts, the possibilities are endless.
This guide will walk you through every aspect of your oven, from initial setup and safety precautions to detailed explanations of each function. We’ll cover everything from understanding the control panel to mastering advanced techniques like using the delay start timer. Remember to carefully read through each section before operating the oven to maximize its potential and ensure your safety. Enjoy your culinary journey!
Safety Precautions
Your safety is paramount when operating the Bellissimo Technika oven. Always ensure the oven is properly installed and grounded by a qualified technician. Never attempt to repair the oven yourself; contact authorized service personnel for any maintenance or repairs. Keep flammable materials away from the oven’s vicinity during operation.
Exercise extreme caution when the oven is in use, as all surfaces become hot. Utilize oven mitts or pot holders when handling hot cookware or oven racks. Supervise children closely when the oven is operating, and never allow them to touch the hot surfaces or controls. Be mindful of the hot oven door and seal.
Avoid using harsh abrasive cleaners on the oven’s surfaces, as they can cause damage. Disconnect the oven from the power supply before cleaning. Never immerse the oven or its electrical components in water. Regularly inspect the power cord for any signs of damage and replace it if necessary. Following these precautions will ensure a safe and enjoyable cooking experience.
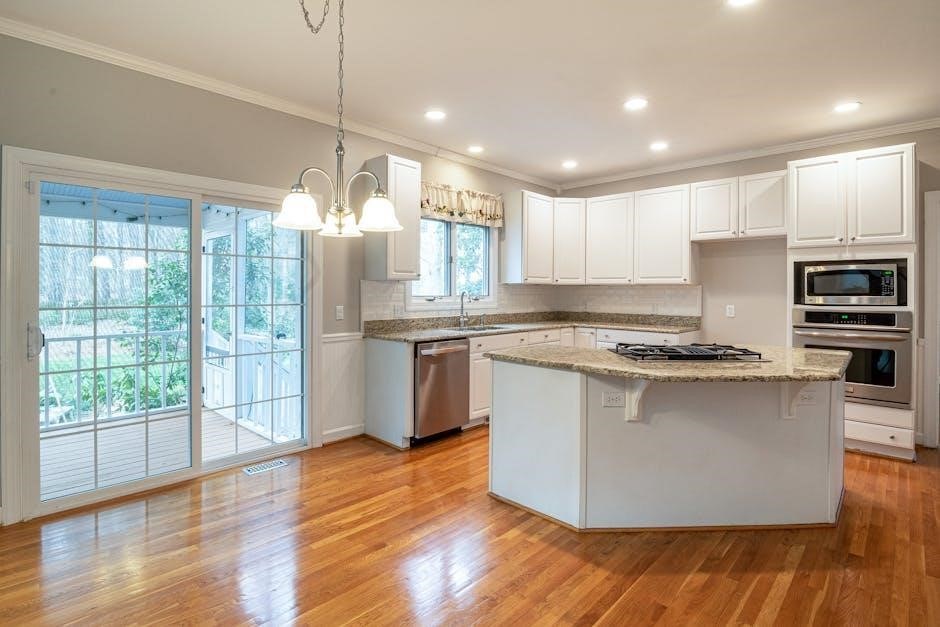
Oven Components & Features
The Bellissimo Technika oven boasts a range of features designed for versatile cooking. Key components include a spacious interior cavity constructed from durable, easy-to-clean materials. The oven door features a tight-sealing design to maintain consistent temperatures during operation, enhancing cooking efficiency.
The intuitive control panel provides precise control over cooking settings, including temperature, cooking mode, and timer functions. Interior oven lighting illuminates the cavity, allowing for easy monitoring of food progress without opening the door. Robust oven racks accommodate various cookware sizes and shapes.
Additional features may include a convection fan for even heat distribution, a grilling element for browning and searing, and a defrosting mode for safely thawing frozen foods. The oven’s design prioritizes both functionality and user convenience, offering a seamless cooking experience. Familiarizing yourself with these components will maximize your oven’s potential.
3.1 Control Panel Overview
The Bellissimo Technika oven’s control panel is designed for intuitive operation. It features a clear digital display indicating the current time, set temperature, and cooking mode. Dedicated buttons allow for easy selection of various cooking functions, including conventional bake, fan-assisted bake, grill, and defrost.
A temperature control dial or buttons enable precise temperature adjustments, ensuring optimal cooking results. The timer function allows you to set cooking durations, with an audible alarm signaling completion. A delay start option permits pre-programming the oven to begin cooking at a later time, offering convenience and flexibility.
Additional buttons may include options for adjusting oven lighting, activating a self-cleaning cycle (if applicable), or customizing settings. The panel’s layout is logically organized, providing quick access to frequently used functions. Refer to the diagram for specific button locations and their corresponding functions.

3.2 Interior Oven Cavity
The Bellissimo Technika oven’s interior cavity is engineered for efficient and even heat distribution. Constructed from durable, easy-to-clean stainless steel, it resists corrosion and maintains hygiene. The cavity’s spacious design accommodates various cookware sizes, including large roasting pans and multiple baking sheets.
Rack positions are adjustable, allowing you to customize the oven’s configuration based on your cooking needs. A built-in oven light illuminates the interior, providing clear visibility during cooking. The cavity’s smooth surfaces promote airflow, minimizing hot spots and ensuring consistent results.
The enamel coating simplifies cleaning, preventing food residue from sticking. Avoid using abrasive cleaners, as they may damage the surface. Regularly inspect the cavity for any spills or debris, promptly cleaning them to maintain optimal performance and prevent odors. Proper ventilation within the cavity ensures safe and efficient operation.
3.3 Oven Door & Seal
The Bellissimo Technika oven door is designed for safety, durability, and efficient heat retention. Constructed with a robust frame and tempered glass, it provides a clear view of the cooking process while maintaining a secure seal. The door features a smooth-opening and closing mechanism, ensuring effortless operation.
The oven door seal, a critical component, prevents heat leakage during cooking, contributing to energy efficiency and consistent temperatures. Regularly inspect the seal for any signs of damage, such as cracks or tears. A compromised seal can lead to temperature fluctuations and increased energy consumption.
To clean the door and seal, use a mild detergent and a soft cloth. Avoid abrasive cleaners, which can damage the glass or the seal; Ensure the seal is dry before closing the door. Proper door closure is essential for safe and effective oven operation. If the door doesn’t close securely, consult a qualified technician.

Initial Setup & First Use
Before your first culinary adventure with the Bellissimo Technika oven, a few essential steps will ensure optimal performance and longevity. Carefully unpack the oven, removing all packaging materials and protective films. Verify that all included accessories, such as baking trays, racks, and the user manual, are present.
Following unpacking, a thorough initial cleaning is recommended. Wipe down the interior with a damp cloth and mild detergent to remove any manufacturing residue. Avoid abrasive cleaners, which could damage the oven’s surfaces. The exterior can be cleaned similarly, paying attention to the control panel and door.
Once clean, set the clock and time. Refer to section 4.3 for detailed instructions on navigating the control panel and accurately setting the time. It’s crucial to have the correct time for utilizing the timer and delay start functions. A brief ‘burn-off’ cycle, running the oven empty at a moderate temperature for approximately 30 minutes, can eliminate any lingering odors.
4.1 Removing Packaging & Accessories
Carefully unpack your new Bellissimo Technika oven, ensuring a safe and damage-free removal process. Begin by positioning the oven in its intended location, providing adequate ventilation around all sides. Using a sharp knife or scissors, cautiously cut through the packaging materials, avoiding any potential scratches to the oven’s surface.
Once the outer packaging is removed, inspect the oven for any visible signs of damage incurred during shipping. If damage is present, immediately contact the retailer or Bellissimo Technika customer support. Retain all packaging materials for potential return or inspection purposes.
Identify and remove all included accessories. These typically include baking trays, wire racks, a roasting pan, and potentially a temperature probe. Refer to the included accessory list within the user manual to confirm all items are accounted for. Remove any protective wrapping from the accessories before use. Store the accessories in a convenient location for easy access during cooking.
4.2 Initial Cleaning Procedure
Before your first culinary adventure with the Bellissimo Technika oven, a thorough initial cleaning is essential. This removes any manufacturing residues or packaging dust that may affect the taste of your food or produce unwanted odors. Begin by wiping down the interior oven cavity with a soft, damp cloth and a mild detergent solution.
Avoid abrasive cleaners or scouring pads, as these can damage the enamel coating. Pay particular attention to any areas with visible residue. Rinse thoroughly with a clean, damp cloth to remove all traces of detergent. For the oven door and exterior surfaces, use the same mild detergent solution and a soft cloth.
Remove and wash the baking trays, wire racks, and roasting pan in warm, soapy water. Dry all components completely before reassembling them within the oven. A final wipe-down with a clean, dry cloth will ensure a spotless and ready-to-use appliance. This initial cleaning prepares your oven for optimal performance.
4.3 Setting the Clock & Time
Accurate timekeeping is crucial for utilizing the Bellissimo Technika oven’s timer and delay start functions. To set the clock, locate the ‘Clock’ or ‘Time Set’ button on the control panel. Press and hold this button until the hour digits begin to flash. Use the arrow buttons (or corresponding controls) to adjust the hour to the correct value.
Once the hour is set, press the ‘Clock’ button again to move to the minute digits, which will now be flashing. Adjust the minutes using the arrow buttons until the correct time is displayed. Press the ‘Clock’ button one final time to confirm the time setting.
Ensure you’ve selected the correct time format (12-hour or 24-hour) within the oven’s settings menu, if applicable. A correctly set clock ensures precise cooking times and reliable operation of the oven’s programmed features. Refer to the control panel diagram for specific button locations.
Cooking Modes Explained
The Bellissimo Technika oven offers a variety of cooking modes to suit different culinary needs. Understanding each mode is key to achieving optimal results. Conventional Baking utilizes heat from the top and bottom elements, ideal for traditional baking of cakes, cookies, and casseroles. It provides even heat distribution for consistent cooking.
Fan Assisted Baking combines conventional heat with a fan, circulating hot air throughout the oven cavity. This results in faster cooking times and more uniform browning, perfect for roasting meats and vegetables. Grilling Function uses a high-intensity top element for quick browning and searing, suitable for grilling steaks, fish, and kebabs.

Defrosting Mode utilizes a low-power heating element and fan to gently thaw frozen foods without cooking them. This mode preserves the texture and flavor of the food. Always consult recipe guidelines for recommended cooking modes and temperatures. Experimenting with these modes will unlock the full potential of your oven.
5.1 Conventional Baking
Conventional Baking is the traditional method of oven cooking, utilizing static heat from the top and bottom heating elements. This mode is perfect for recipes requiring gentle, even heat distribution, such as cakes, pastries, and soufflés. It’s also excellent for slow-cooking meats and baking casseroles where a consistent temperature is crucial.
To use Conventional Baking, select the corresponding icon on the control panel. Preheat the oven to the desired temperature, allowing sufficient time for it to reach the set point. Place your dish in the center of the oven cavity for optimal heat circulation. Avoid opening the oven door frequently during baking, as this can cause temperature fluctuations.
Recommended temperatures vary depending on the recipe, but generally range from 325°F (160°C) to 375°F (190°C). For best results, use oven-safe cookware and follow the recipe’s specified baking time. Conventional baking delivers classic results, ideal for achieving perfectly golden-brown finishes and tender textures.
5.2 Fan Assisted Baking
Fan Assisted Baking utilizes a fan to circulate hot air throughout the oven cavity, resulting in faster and more even cooking. This mode is ideal for larger meals, multiple trays of baking, or when you need to reduce cooking times. The circulating air ensures consistent temperatures across all oven racks, eliminating hot spots;
To activate Fan Assisted Baking, select the fan icon on the control panel. Preheat the oven as usual, noting that fan-assisted cooking often requires a slightly lower temperature than conventional baking – typically 25°F (15°C) less. Position your dishes on the middle or lower racks for optimal airflow.
This mode is particularly effective for roasting meats, baking cookies, and cooking pizzas. The fan helps to create a crispy exterior while maintaining a moist interior. Remember to check food for doneness slightly earlier than the recipe suggests, as cooking times are generally reduced with fan assistance. Enjoy quicker, more consistent results!
5.3 Grilling Function
The Grilling function utilizes a high-intensity heat source from the upper element to quickly brown and cook food. It’s perfect for grilling meats, vegetables, and achieving a golden-brown finish on dishes like gratins. This mode operates at a very high temperature, so careful monitoring is essential to prevent burning.
To use the Grilling function, select the grill icon on the control panel. Position the oven rack to the highest setting, placing the food approximately 4-6 inches below the grill element. For thicker cuts of meat, a lower rack position may be preferable to prevent the exterior from burning before the interior is cooked through.
Always use oven-safe grilling trays or racks to allow fat and juices to drip away from the food. Avoid using excessively fatty foods, as this can cause smoke and flare-ups. Regularly check the food during grilling and turn it as needed to ensure even cooking. Remember to exercise caution when opening the oven door during grilling, as the escaping heat can be intense.

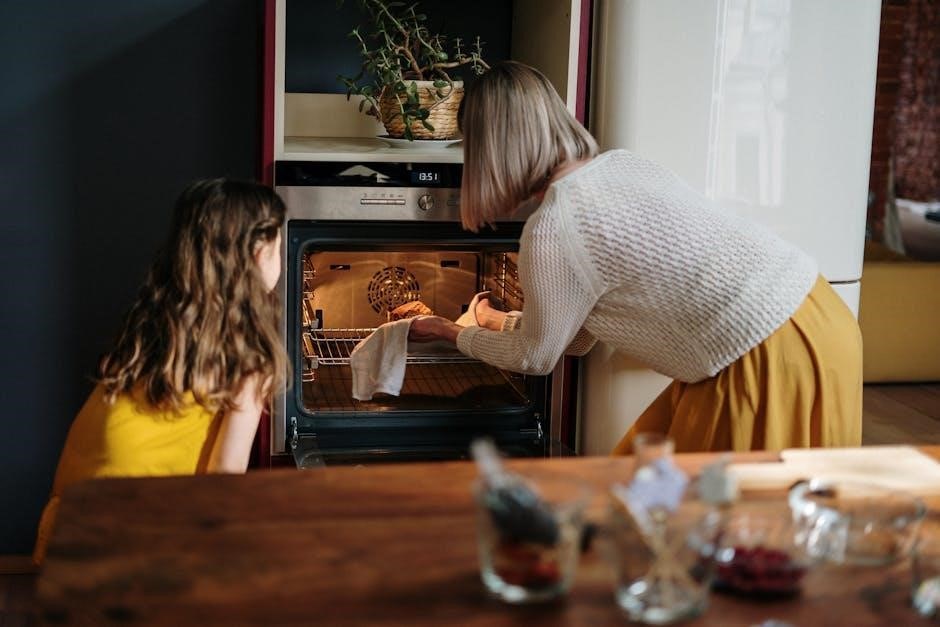
5.4 Defrosting Mode
The Defrosting Mode offers a gentle and efficient way to thaw frozen foods without cooking them. Utilizing a low-power heating element and circulating air, it prevents the outer layers from cooking while the interior remains frozen. This function is ideal for meats, poultry, fish, and bread, ensuring even thawing and preserving food quality.
To initiate the Defrosting Mode, press the dedicated defrost button on the control panel. You’ll typically be prompted to enter the weight of the food item. Accurate weight input is crucial for optimal defrosting performance. The oven will then calculate the appropriate defrosting time based on the weight provided.
During defrosting, it’s recommended to occasionally turn or separate the food to promote even thawing. Remove any packaging materials before starting the defrosting cycle. Always cook the defrosted food immediately after the cycle is complete to prevent bacterial growth. Note: Do not re-freeze food that has been defrosted using this mode.
Using the Timer & Delay Start
The Bellissimo Technika oven features both a timer and a delay start function, offering convenience and flexibility in your cooking schedule. The timer allows you to set a countdown for any cooking process, alerting you when it’s finished, even if the oven is not actively cooking. This is useful for tasks like proofing dough or monitoring simmering sauces.
The Delay Start function enables you to pre-program the oven to begin cooking at a later time. This is perfect for preparing meals in advance, ensuring they are ready when you arrive home or for specific meal times. To use Delay Start, first set the desired cooking mode, temperature, and duration. Then, activate the Delay Start and specify the start time.
Both functions are controlled through the intuitive control panel. Refer to the panel’s display and corresponding buttons for precise operation. Remember to check that all safety precautions are followed when utilizing the Delay Start feature, particularly regarding food safety and potential hazards.
Cleaning & Maintenance
Maintaining your Bellissimo Technika oven ensures longevity and optimal performance. Regular cleaning prevents buildup of food residue and grease, which can affect cooking results and potentially create safety hazards. The oven offers both self-cleaning (if equipped) and manual cleaning options.
If your model features a self-cleaning function, follow the specific instructions in this guide. This typically involves locking the door and running a high-temperature cycle to burn off residue. Always ensure the kitchen is well-ventilated during this process. For manual cleaning, allow the oven to cool completely before wiping down the interior with a mild detergent and warm water.
Pay attention to the oven door and seal, cleaning them regularly to maintain a tight seal for efficient cooking. Avoid abrasive cleaners, as they can damage the surfaces. Regularly inspect the oven components for any signs of wear or damage, and address them promptly. Proper maintenance will keep your Bellissimo Technika oven functioning flawlessly for years to come.
7.1 Self-Cleaning Function (If Applicable)
The Bellissimo Technika oven’s self-cleaning cycle utilizes high temperatures to efficiently burn off food residue within the oven cavity. Before initiating, remove all racks, cookware, and any loose debris. Ensure proper ventilation by opening windows or using a range hood, as the process can generate odors and some smoke.
To start the self-cleaning cycle, press the designated “Self Clean” button on the control panel. Select the desired cleaning duration – options typically range from 2 to 4 hours, depending on the level of soiling. Once activated, the oven door will automatically lock for safety and remain locked throughout the cycle and cooling period.
Do not attempt to open the door during operation. After the cycle completes, allow the oven to cool completely before unlocking the door and wiping away any remaining ash with a damp cloth. Caution: The oven surfaces will be extremely hot during and after the self-cleaning cycle. Never touch them without adequate protection.
7.2 Manual Cleaning Procedures
For regular maintenance, manual cleaning of your Bellissimo Technika oven is recommended. Always ensure the oven is cool and disconnected from the power supply before beginning. Start by removing racks, baking stones, and any loose debris from the interior.
Prepare a cleaning solution of warm water and mild dish soap, or utilize a commercially available oven cleaner following the manufacturer’s instructions carefully. Avoid abrasive cleaners, as they can damage the oven’s surfaces. Apply the solution to the interior walls, floor, and door, avoiding heating elements and ventilation openings.
Allow the solution to sit for 15-20 minutes to loosen baked-on food particles. Then, using a soft cloth or sponge, gently scrub the interior surfaces. For stubborn residue, a paste of baking soda and water can be effective. Rinse thoroughly with clean water and dry with a soft cloth. The oven door glass can be cleaned with glass cleaner.
Troubleshooting Common Issues
If your Bellissimo Technika oven isn’t heating, first verify the power supply and ensure the oven is properly connected. Check the control panel for error codes, referencing the user manual for specific meanings. A tripped circuit breaker could also be the culprit; reset if necessary.
Uneven baking often stems from improper rack placement or overloading the oven. Rotate the baking sheet halfway through cooking for more consistent results. If the oven temperature seems inaccurate, consider calibrating it according to the manual’s instructions.
Smoke during operation might indicate food spills or grease buildup. Perform a thorough cleaning as outlined in the maintenance section. If the oven door isn’t sealing properly, inspect the door gasket for damage and replace if needed. For persistent issues, contact customer support, providing the model number and a detailed description of the problem.
Warranty Information & Support
Your Bellissimo Technika oven is covered by a one-year limited warranty against manufacturing defects in materials and workmanship, starting from the original purchase date. This warranty doesn’t cover damage resulting from misuse, accidents, or unauthorized repairs. Proof of purchase is required for all warranty claims.
For warranty service or support, please contact our dedicated customer care team. You can reach us via phone at 1-800-BELLISSIMO (1-800-235-5477) during business hours (Monday-Friday, 9 AM to 5 PM EST). Alternatively, email us at support@bellissimotechnika.com. Please include your model number, serial number, and a detailed description of the issue.
Visit our website at www.bellissimotechnika.com for frequently asked questions, downloadable manuals, and helpful troubleshooting guides. We also offer online chat support for immediate assistance. Extended warranty options may be available for purchase, providing additional peace of mind. Retain this manual for future reference.