Honeywell TH6220U2000 Installation Manual PDF: A Comprehensive Guide
Navigating the intricacies of your home’s climate control begins with this detailed PDF, offering step-by-step guidance for a seamless installation experience, ensuring optimal performance.
Understanding the Honeywell TH6220U2000
The Honeywell TH6220U2000 is a popular, non-programmable thermostat designed for reliable control of your home’s heating and cooling systems. This model provides basic functionality, making it a straightforward replacement for older thermostats. It’s crucial to understand its capabilities before beginning installation, as it lacks advanced features like Wi-Fi connectivity or touchscreen displays found in newer models.
This thermostat is compatible with most standard 24-volt HVAC systems, including furnaces, air conditioners, and heat pumps. Familiarizing yourself with the terminal connections – R, C, W, Y, and G – is essential for correct wiring. The manual PDF provides detailed diagrams and explanations to aid in this process. Proper understanding ensures accurate temperature regulation and efficient system operation, avoiding potential issues post-installation. Remember to consult the manual for specific compatibility details related to your HVAC setup.
Key Features and Specifications
The Honeywell TH6220U2000 boasts several key features, including precise temperature control and compatibility with various heating and cooling systems. Its simple interface makes operation intuitive, even for those unfamiliar with programmable thermostats. Specifications include a temperature range of 40°F to 90°F (4°C to 32°C), and it requires 24VAC power.
This thermostat supports single-stage heating and cooling, meaning it can only operate at one level of intensity. It utilizes a standard LCD display for clear temperature readings and system status. The manual PDF details the electrical specifications, wire size requirements, and physical dimensions for proper installation. Understanding these specifications is vital for ensuring compatibility and a successful setup, maximizing the thermostat’s performance and longevity within your home’s HVAC system.
Package Contents Verification

Before commencing installation, carefully verify the contents of the Honeywell TH6220U2000 package against the included packing list within the PDF manual. You should find the thermostat baseplate, the thermostat display unit, mounting screws and anchors, wire labels, and a detailed installation guide.
Confirm the presence of a jumper wire, if required for your specific HVAC system configuration, as outlined in the manual. Absence of any component necessitates contacting the retailer or Honeywell support. Thorough verification prevents delays and ensures a smooth installation process. The PDF manual provides visual representations of each item, aiding in accurate identification. Retain all packaging materials until installation is complete and you’ve confirmed full functionality, allowing for easy returns if needed.
Pre-Installation Considerations
Prior to beginning, review safety precautions, required tools, and HVAC compatibility detailed within the Honeywell TH6220U2000 installation manual PDF for success.
Safety Precautions
Before commencing the installation of your Honeywell TH6220U2000 thermostat, prioritizing safety is paramount. Always disconnect power to your HVAC system at the breaker box to prevent electrical shock – this is a non-negotiable step. Exercise caution when handling wiring, ensuring no bare wires are exposed. If you are uncomfortable working with electrical components, consult a qualified HVAC technician.
Carefully read and understand all warnings and cautions outlined in the Honeywell TH6220U2000 installation manual PDF. Avoid installing the thermostat in areas exposed to direct sunlight, extreme temperatures, or moisture, as this can affect its performance and potentially create a safety hazard. Keep the thermostat and its components out of reach of children. Proper grounding is essential; verify the system is correctly grounded before proceeding. Following these precautions will ensure a safe and successful installation process, protecting both you and your HVAC system.
Tools Required for Installation
To ensure a smooth and efficient installation of your Honeywell TH6220U2000 thermostat, gathering the necessary tools beforehand is crucial. A Phillips head screwdriver is essential for removing and installing the thermostat and mounting plate. A flathead screwdriver may also be needed for certain terminal connections. Wire strippers are vital for preparing the thermostat wires, ensuring clean and secure connections.
A small level will help guarantee the thermostat is mounted straight, improving its aesthetic appeal and accurate temperature readings. A voltage tester is highly recommended to verify power is completely off before handling any wiring. Pliers can assist with bending or manipulating wires if needed. Finally, having a digital multimeter available can be helpful for troubleshooting potential electrical issues. Referencing the Honeywell TH6220U2000 installation manual PDF will confirm any specific tool requirements for your setup.
Compatibility Check with HVAC Systems
Before commencing the installation, verifying compatibility between the Honeywell TH6220U2000 and your existing HVAC system is paramount. This thermostat generally supports standard 24V heating and cooling systems, including furnaces, air conditioners, and heat pumps. However, it’s crucial to confirm your system doesn’t utilize proprietary communication protocols or require a C-wire (common wire) which may necessitate an adapter kit.
Consult the Honeywell TH6220U2000 installation manual PDF to review a detailed list of compatible system types. Carefully examine your current thermostat wiring; if you have a millivolt system or a system with unusual wiring configurations, professional assistance is recommended; Incorrect installation can damage both the thermostat and your HVAC equipment. Prioritize safety and system integrity by confirming full compatibility before proceeding.

Installation Process: Step-by-Step
Follow this detailed, sequential guide within the Honeywell TH6220U2000 manual PDF to ensure a correct and efficient installation, maximizing your thermostat’s functionality.
Step 1: Powering Down the HVAC System
Before commencing any wiring or installation procedures with your Honeywell TH6220U2000, absolutely prioritize safety by completely disconnecting power to your heating, ventilation, and air conditioning (HVAC) system. This crucial step prevents electrical shock and potential damage to both the thermostat and your HVAC equipment. Locate the circuit breaker that controls your HVAC system – it’s typically labeled – and switch it to the ‘OFF’ position.
Confirm the power is indeed off by attempting to operate the system from your existing thermostat; no response indicates successful disconnection. Double-check using a non-contact voltage tester at the thermostat wires for added assurance. This preliminary precaution, detailed within the installation manual PDF, is paramount for a safe and successful installation process, safeguarding both you and your home’s systems.
Step 2: Removing the Old Thermostat
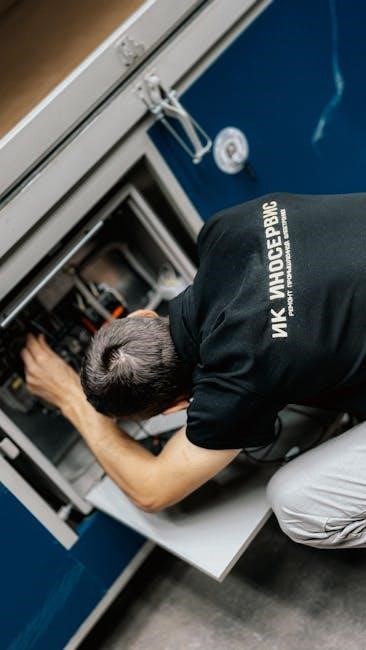
Carefully detach your existing thermostat from the wall plate, often secured by screws or clips. Before disconnecting any wires, crucially photograph the existing wiring configuration – this serves as an invaluable reference during the Honeywell TH6220U2000 installation. Label each wire with the corresponding terminal designation (R, C, W, Y, G, etc.) using the provided wire labels or masking tape.
Gently disconnect each wire from the old thermostat terminals, avoiding any strain or breakage. Once all wires are disconnected, remove the old wall plate. Inspect the wall for any damage and address it before mounting the new thermostat base. The installation manual PDF emphasizes meticulous documentation of the original wiring to ensure a smooth transition and correct functionality of your new Honeywell thermostat.
Step 3: Wiring the Honeywell TH6220U2000
Referencing the photograph and labels created during old thermostat removal, connect each wire to the corresponding terminal on the Honeywell TH6220U2000 base. The manual PDF clearly illustrates terminal connections: R (power), C (common), W (heating), Y (cooling), and G (fan). Ensure wires are securely inserted into the terminals – a loose connection can cause malfunctions.
Double-check all connections against the wiring diagram in the installation guide; Incorrect wiring can damage your HVAC system. If you encounter any uncertainty, consult a qualified HVAC technician. The Honeywell TH6220U2000 Manual emphasizes the importance of precise wiring for optimal performance and safety, preventing potential system failures or hazards.
Identifying Terminal Connections (R, C, W, Y, G)
Before connecting any wires, carefully identify each terminal on both your old thermostat and the Honeywell TH6220U2000 base. The ‘R’ terminal provides power to the thermostat; ‘C’ is the common wire, essential for consistent operation. ‘W’ activates the heating system, ‘Y’ controls cooling, and ‘G’ manages the fan.
The Honeywell TH6220U2000 Manual PDF provides detailed diagrams illustrating these terminals. It’s crucial to accurately label each wire before disconnecting it from the old thermostat. This prevents confusion during re-wiring. Mismatched connections can lead to system malfunctions or damage. Take a clear photograph of the existing wiring as a reference point, ensuring a smooth and accurate installation process.
Connecting the Wires Correctly
Using your previously created wire labels and the Honeywell TH6220U2000 Manual PDF diagrams, carefully connect each wire to the corresponding terminal on the new thermostat base. Ensure each wire is securely inserted into the terminal, avoiding loose connections. A firm connection is vital for reliable operation.
Double-check all connections against your photograph and the manual before proceeding. Incorrect wiring can damage your HVAC system. If you encounter any uncertainty, consult a qualified HVAC technician. Gently tug on each wire to confirm it’s firmly seated. Proper wiring is paramount for a functional and safe thermostat installation, guaranteeing optimal climate control within your home.
Step 4: Mounting the Thermostat Base
With the wiring completed and verified, carefully position the thermostat base on the wall, aligning it with the pre-drilled holes or using the provided mounting screws. Ensure the base is level for accurate temperature readings and a professional appearance. Use a screwdriver to securely fasten the base to the wall, avoiding over-tightening which could damage the wall or the base itself.
Confirm the base is firmly attached and doesn’t wobble. A stable base is crucial for proper thermostat function. Double-check that no wires are pinched or strained during the mounting process. This step establishes a solid foundation for the thermostat display attachment, ensuring long-term reliability and accurate climate control.
Step 5: Attaching the Thermostat Display
Gently align the thermostat display with the mounted base, ensuring it clicks securely into place. Avoid forcing the display, as this could damage the connection pins. A proper connection is vital for the thermostat to function correctly and display information accurately. Once attached, verify the display is firmly seated and doesn’t exhibit any looseness or instability.
Inspect the connection from multiple angles to confirm a flush fit. This final physical step completes the hardware installation process. With the display attached, you’re now ready to proceed to the post-installation configuration, including powering on the system and setting your desired preferences for optimal comfort and energy efficiency.
Post-Installation Configuration
Successfully completing the physical installation unlocks the thermostat’s potential; now, configure settings like date, time, and personalized heating/cooling schedules for optimal use.
Initial Power-Up and System Check
Upon restoring power to your HVAC system after installation, the Honeywell TH6220U2000 should initiate its startup sequence, displaying the welcome screen and prompting initial configuration. Carefully observe the display for any error messages; these indicate potential wiring issues or system incompatibilities requiring immediate attention.
Perform a comprehensive system check by activating both heating and cooling modes. Verify that the correct functions are engaged – warm air during heating and cool air during cooling – and listen for any unusual noises emanating from your furnace or air conditioner. Confirm the fan operates as expected in both auto and on settings.
If discrepancies arise during this initial check, immediately power down the system and revisit the wiring connections, ensuring accuracy according to the installation manual. A thorough system check prevents future complications and guarantees efficient operation.
Setting the Date and Time
Accurate date and time settings are crucial for proper scheduling and functionality of your Honeywell TH6220U2000 thermostat. Access the settings menu, typically through the “Menu” or “Settings” button on the thermostat interface. Navigate to the “Date and Time” option, often found within the system configuration settings.
Utilize the up and down arrow keys, or the touchscreen interface if applicable, to adjust the month, day, and year. Subsequently, set the current time, ensuring you correctly designate AM or PM. Save your changes; the thermostat will then display the updated date and time on the main screen.
Verify the accuracy of the settings by comparing them to a reliable time source. Correct date and time settings enable precise scheduling, optimizing energy efficiency and comfort within your home environment.
Programming the Heating and Cooling Schedule
Maximize energy savings and comfort by programming a personalized heating and cooling schedule on your Honeywell TH6220U2000. Access the “Schedule” or “Programming” menu via the thermostat’s interface. Typically, you can create different schedules for weekdays and weekends, accommodating varying occupancy patterns.

Define specific time periods – such as “Wake,” “Leave,” “Return,” and “Sleep” – and assign desired temperatures for each period. For example, lower the temperature while you’re away at work and raise it before you return home. Utilize the thermostat’s intuitive controls to easily adjust these settings.
Review your programmed schedule to ensure it aligns with your lifestyle and preferences. Consistent scheduling optimizes energy usage, reducing utility bills and maintaining a comfortable indoor climate.
Troubleshooting Common Issues
Addressing potential problems proactively ensures optimal performance; this section details solutions for issues like power failures or inaccurate temperature readings, simplifying diagnostics.
Thermostat Not Powering On
If your Honeywell TH6220U2000 fails to power on, begin with the basics: verify the HVAC system’s power switch is active and the circuit breaker hasn’t tripped. Carefully inspect the thermostat wiring, ensuring the ‘C’ wire (common wire) is securely connected – this is crucial for consistent power. A missing or loose ‘C’ wire is a frequent culprit.
Double-check the batteries, if applicable, replacing them with fresh ones. Confirm the thermostat base is firmly mounted and properly seated on the wall plate. If the issue persists, examine the HVAC system’s transformer; a faulty transformer can prevent power from reaching the thermostat. Consult a qualified HVAC technician if you’re uncomfortable working with electrical components. Remember safety first!
Incorrect Temperature Readings

Experiencing inaccurate temperature readings with your Honeywell TH6220U2000? First, ensure the thermostat isn’t directly exposed to sunlight, drafts, or heat-generating appliances, as these can skew results. Verify the thermostat is level; an unlevel installation can affect sensor accuracy. Check for obstructions blocking airflow around the unit.
Within the thermostat’s settings, explore the calibration feature – many models allow for minor temperature adjustments. If the problem continues, confirm the thermostat’s location isn’t influenced by poor insulation or exterior walls. Consider a professional HVAC assessment to rule out issues with your HVAC system itself, as faulty sensors within the system can also cause inaccurate readings.