West Bend Coffee Pot Instructions: A Comprehensive Guide (Updated 12/22/2025)
Today, December 22nd, 2025, this guide details the iconic West Bend percolator, a 1950s kitchen staple known for its durable stainless steel and robust coffee brewing.
The West Bend Coffee Pot, particularly the percolator models, holds a special place in American culinary history. Emerging as a household essential in the mid-20th century, these pots quickly became synonymous with a comforting, reliably strong cup of coffee.
Their enduring appeal stems from a combination of robust construction – primarily stainless steel – and a relatively simple brewing process. Unlike drip coffee makers, percolators repeatedly cycle brewing water through coffee grounds, resulting in a bolder, more intense flavor profile. This guide aims to provide a comprehensive overview of West Bend coffee pots, covering everything from historical context to detailed operating instructions and maintenance tips.
Historical Significance & Popularity
The West Bend percolator’s rise to prominence in the 1950s mirrored a shift in American coffee culture. Post-war prosperity fueled a demand for convenient, yet quality, home appliances. West Bend answered this call with a durable and aesthetically pleasing coffee pot.
Its stainless steel construction signified modernity and reliability, while the percolating process delivered a strong brew favored by many. The pot became a symbol of family gatherings and daily routines. West Bend’s marketing emphasized ease of use and consistent results, solidifying its place as a kitchen mainstay for decades, and continues to be sought after today.
Understanding West Bend Percolator Models
West Bend produced a variety of percolators over the years, catering to different needs and preferences. Early models were primarily manual, relying on stovetop heat. These classic versions, often featuring polished stainless steel, required user monitoring throughout the brewing cycle.
Later, electric percolators emerged, offering automated operation and convenience. These models incorporated a heating element in the base and often included features like automatic shut-off. Identifying your specific model is crucial for proper use and maintenance, as instructions can vary slightly between manual and electric types.
Classic Stainless Steel Percolators
These models exemplify West Bend’s enduring quality, constructed with durable stainless steel for longevity and a timeless aesthetic. They require direct stovetop heating, offering users full control over the brewing process. The percolator’s design features a pump tube and basket, crucial for circulating water through the coffee grounds.
Achieving optimal flavor relies on careful monitoring; listening for the characteristic “perk” sound indicates brewing is underway. Stainless steel percolators are prized for their ability to produce a robust, flavorful cup of coffee, and with proper care, can last for generations.
Electric Percolators – Variations & Features
West Bend’s electric percolators offered convenience, eliminating the need for stovetop monitoring. Variations included different sizes and finishes, catering to diverse household needs. A key feature is the integrated heating element within the base, providing consistent and controlled heat.
Many models boast automatic shut-off functions, enhancing safety and preventing scorching. Electric percolators simplify brewing, making strong coffee accessible with minimal effort. These models often include a removable basket for easy cleaning, and a clear knob for observing the percolation process.
Essential Parts of a West Bend Coffee Pot
Understanding the components is key to successful operation. The core structure features a robust base, housing the heating element in electric models. Above this sits the water reservoir, crucial for the brewing process. A central pump tube facilitates water circulation.
The percolator basket holds the coffee grounds, while the lid, often with a clear knob, allows monitoring. Stainless steel construction ensures durability. These parts work in harmony to deliver that classic West Bend coffee flavor, making each component vital for optimal performance and longevity.
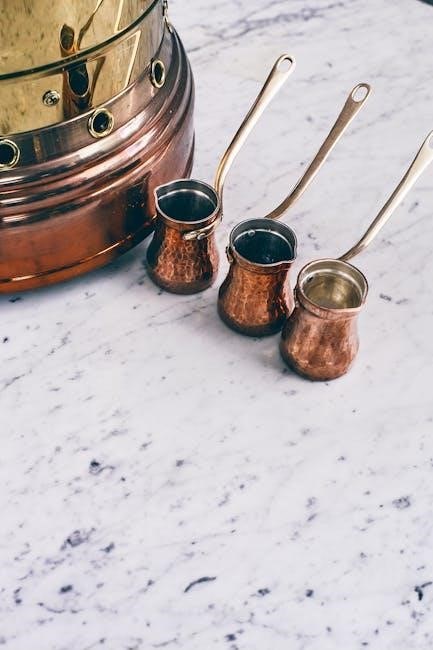
The Percolator Basket
The percolator basket is a critical component, designed to hold the ground coffee during the brewing cycle. Typically constructed from stainless steel, it allows hot water to repeatedly pass through the grounds, extracting flavor.
Proper placement within the pot is essential for effective percolation. Different models may feature varying basket designs – some are removable for easy cleaning, while others are permanently fixed. Ensure the basket isn’t overfilled to prevent grounds from escaping into the brewed coffee, impacting clarity and taste.
The Pump Tube
The pump tube, a central element, facilitates the cyclical process of percolation. This tube extends from the base of the pot, rising through the center and terminating near the percolator basket. Its function is to carry heated water upwards, initiating the brewing action.

As water heats, it rises through the tube, sprinkling over the coffee grounds in the basket. This continuous cycle extracts flavor until the desired strength is achieved. Regular inspection is vital; ensure the tube is clear of obstructions to maintain efficient water flow and optimal coffee brewing performance.
The Lid & Knob Assembly
The West Bend percolator lid is crucial for maintaining temperature and observing the brewing process. Often crafted from clear glass with a stainless steel rim, it allows you to monitor the coffee’s color and intensity. The knob, typically made of heat-resistant plastic or bakelite, provides a secure grip for handling the hot lid.
Proper lid placement is essential to prevent heat loss and ensure efficient percolation. A tight seal also minimizes splattering. Carefully inspect the lid for cracks or damage before each use, as a compromised lid can affect brewing quality and safety.
The Base & Heating Element (Electric Models)
The base of an electric West Bend percolator houses the crucial heating element responsible for warming the water and driving the percolation cycle. Typically constructed from durable metal, the base provides stability and supports the entire brewing assembly. The heating element itself is often a coiled resistance wire encased within a protective housing.
Ensure the base is clean and dry before each use to prevent electrical hazards. Modern models often feature automatic shut-off mechanisms integrated into the base for enhanced safety. Regular inspection of the power cord and base for damage is vital for continued safe operation.
Step-by-Step Instructions: Manual Percolators
Begin by filling the pot with the desired amount of cold water, reaching the indicated level inside. Next, add coarsely ground coffee to the percolator basket – a general guideline is one to two tablespoons per six ounces of water. Securely place the pump tube into the base, ensuring it’s properly seated.
Assemble the percolator by fitting the basket and pump tube assembly into the pot, then firmly attaching the lid. Place the assembled percolator on a stovetop burner over medium heat. Monitor the brewing process by observing the glass knob; percolation begins when coffee bubbles appear.
Adding Water & Coffee Grounds
Start with fresh, cold water, filling your West Bend percolator to the desired level, typically indicated by markings inside the pot. Avoid using softened water as it can affect the coffee’s flavor. For optimal results, use coarsely ground coffee; a medium-fine grind can seep through the basket.

A common ratio is one to two tablespoons of coffee per six ounces of water, but adjust to your preference. Place the coffee grounds inside the percolator basket, ensuring they are evenly distributed. Do not pack the grounds tightly, allowing water to circulate freely for proper extraction.
Assembling the Percolator
Carefully insert the pump tube into the designated hole in the percolator’s base, ensuring a secure fit. Position the percolator basket over the pump tube, centering it within the pot. The basket should sit freely without being forced or obstructed.
Next, place the lid onto the percolator, aligning the knob correctly. Ensure a snug fit to maintain pressure during the brewing process. For electric models, confirm the lid’s power connection is properly engaged. A properly assembled percolator is crucial for efficient and safe operation.
Percolating Process & Monitoring
Once heated, water travels up the pump tube and showers over the coffee grounds within the basket. This cycle repeats, creating the characteristic percolating sound and brewing the coffee. Monitor the glass knob on the lid; as coffee brews, you’ll see a dark liquid circulating.

Adjust heat to control the brewing strength – lower heat yields milder coffee. Percolate for 7-10 minutes for optimal flavor. Avoid prolonged percolating, as it can lead to bitter coffee. Regularly check the water level and brewing progress for best results.

Step-by-Step Instructions: Electric Percolators
Begin by filling the electric West Bend percolator with the desired amount of fresh, cold water, ensuring it’s within the indicated fill lines. Next, add coarsely ground coffee to the percolator basket – a general guideline is one tablespoon per cup. Securely place the basket and pump tube assembly into the percolator.
Close the lid tightly, ensuring a proper seal. Plug the percolator into a grounded electrical outlet. The unit will automatically begin the brewing process, indicated by the heating element activating.
Filling with Water & Coffee
Start by carefully pouring fresh, cold water into the West Bend percolator’s reservoir. Pay close attention to the water level indicators, avoiding overfilling. For optimal flavor, use filtered water. Next, measure coarsely ground coffee – a standard ratio is one to two tablespoons per six-ounce cup.
Place the coffee grounds into the designated percolator basket. Ensure the grounds are evenly distributed for consistent brewing. Avoid using finely ground coffee, as it may pass through the basket and into your finished brew.
Powering On & Percolating
Once assembled, plug your West Bend electric percolator into a grounded outlet. The indicator light will illuminate, signaling the heating element is active. Allow the percolator to begin its cycle; you’ll soon hear the characteristic bubbling sound as hot water rises through the pump tube.
Monitor the glass knob on the lid – as the coffee percolates, you’ll observe the color changing from clear to a rich, amber hue. This visual cue indicates brewing progress. Adjust brewing time to achieve desired strength.
Automatic Shut-Off Features
Modern West Bend electric percolators often include an automatic shut-off feature, enhancing safety and convenience. This function typically activates after a pre-determined brewing cycle, preventing overheating and potential hazards. The shut-off is crucial for unattended operation, offering peace of mind.
However, always verify your specific model’s features, as older versions may lack this safety mechanism. Regularly inspect the power cord and base for any damage. Never leave a percolator operating unattended for extended periods, even with the automatic shut-off engaged.
Cleaning & Maintenance
Consistent cleaning is vital for maintaining your West Bend coffee pot’s performance and longevity. After each use, promptly disassemble and wash all removable parts with warm, soapy water. Avoid abrasive cleaners that could scratch the stainless steel. Regular descaling is crucial to remove mineral deposits, impacting flavor and efficiency.
For stubborn stains, a paste of baking soda and water can be effective. Thoroughly rinse all components before reassembling. Proper maintenance ensures years of flavorful coffee, preserving the classic West Bend experience.
Daily Cleaning Procedures
Following each brewing cycle, immediately disassemble your West Bend coffee pot. Wash the basket, pump tube, lid, and carafe with warm, soapy water. Avoid steel wool or abrasive cleaners, opting for a soft sponge or cloth to protect the stainless steel finish. Rinse thoroughly to remove all soap residue, preventing off-flavors in subsequent brews.
Dry all parts completely before reassembling. Wipe down the exterior of the pot with a damp cloth. This simple routine prevents buildup and ensures optimal performance, extending the life of your beloved percolator.
Dealing with Mineral Deposits (Descaling)
Over time, mineral deposits from water can accumulate inside your West Bend percolator, affecting performance and coffee taste. To descale, fill the pot with a 50/50 solution of white vinegar and water. Run a full brewing cycle without coffee grounds. Allow the solution to sit in the pot for one hour after percolating.
Discard the vinegar solution and rinse thoroughly with fresh water, running several cycles to eliminate any residual vinegar taste. Repeat this process every 1-3 months, depending on water hardness, to maintain optimal brewing conditions.
Polishing Stainless Steel
To maintain the gleaming appearance of your classic West Bend stainless steel percolator, regular polishing is recommended. Start by washing the exterior with warm, soapy water and drying it completely. Apply a small amount of stainless steel polish to a soft cloth.
Gently rub the polish onto the surface, following the grain of the steel. Avoid abrasive cleaners that can scratch the finish. Buff with a clean, dry cloth to reveal a brilliant shine. This process not only enhances aesthetics but also helps protect against corrosion.
Troubleshooting Common Issues
Encountering problems with your West Bend percolator? Weak coffee often indicates insufficient grounds or a coarse grind. Bitter coffee can result from over-extraction – reduce brewing time or use a coarser grind. If the percolator isn’t brewing, ensure the pump tube is correctly positioned and free of obstructions.
Check the heating element (electric models) for proper function. Mineral buildup can also hinder performance; regular descaling is crucial. Always prioritize safety and unplug electric models before inspecting internal components.
Coffee is Weak
If your West Bend coffee lacks the desired strength, several factors could be at play. Firstly, ensure you’re using an adequate amount of coffee grounds for the water volume. A general guideline is two tablespoons per six ounces of water, but adjust to your preference. Secondly, consider the grind size; a grind that’s too coarse won’t extract enough flavor.
Experiment with a medium-fine grind. Finally, verify the percolator is functioning correctly – a weak percolation cycle means insufficient contact between water and grounds.
Coffee is Bitter
Bitter coffee from your West Bend percolator often indicates over-extraction. This typically happens when the coffee grounds are exposed to hot water for too long. Reduce the percolating time by carefully monitoring the process and removing the pot from the heat source sooner. Also, ensure you’re not using too much coffee grounds; an excess can lead to bitterness.
Consider a coarser grind size, as finer grinds extract more quickly and can contribute to a bitter taste. Finally, always use fresh, filtered water for optimal flavor.

Percolator Not Percolating
If your West Bend percolator isn’t bubbling, first check the water level – it must cover the pump tube opening. Ensure the pump tube is correctly seated in the stem and isn’t clogged with coffee grounds. A blockage prevents water from circulating. Inspect the percolator basket; it should allow water to flow freely through its perforations.
For electric models, verify the heating element is functioning and the pot is securely placed on the base. If issues persist, mineral buildup might be hindering the process; descaling is recommended.
Safety Precautions
When using your West Bend coffee pot, exercise caution. Hot surfaces, especially the pot’s exterior and lid knob, can cause burns – always use pot holders or oven mitts. For electric models, never immerse the base or cord in water to prevent electrical shock. Ensure the pot is unplugged before cleaning.
Avoid operating the percolator if the cord is damaged. Never leave a percolator unattended while in use. Keep out of reach of children. Always allow the pot to cool completely before handling or storing.
Electrical Safety (Electric Models)
West Bend electric percolators require strict adherence to electrical safety guidelines. Never immerse the base unit in water or any other liquid; this poses a severe shock hazard. Ensure the voltage indicated on the appliance matches your household supply. Inspect the power cord regularly for damage – do not use if frayed.
Always unplug the percolator before cleaning or when not in use. Avoid using extension cords if possible; if necessary, use a heavy-duty cord. Do not operate the appliance with a damaged plug or outlet. Keep the appliance away from water sources.
Handling Hot Surfaces
West Bend coffee pots, particularly during and immediately after brewing, present significant burn risks due to hot surfaces. Always use pot holders or oven mitts when handling the pot, lid, and knob assembly. Be cautious of escaping steam, which can cause severe scalds. Avoid touching the exterior of the percolator base during operation, as it becomes very hot.
Keep children and pets away from the coffee pot while it’s in use. Allow the percolator to cool completely before cleaning or storing. Exercise extreme caution when pouring coffee to prevent spills and burns.